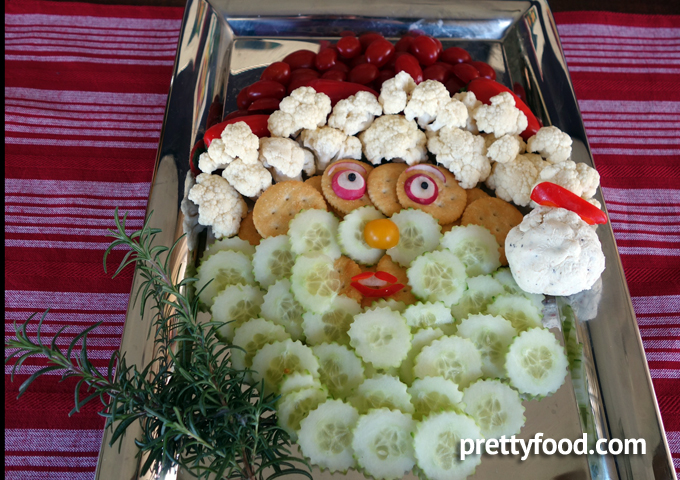
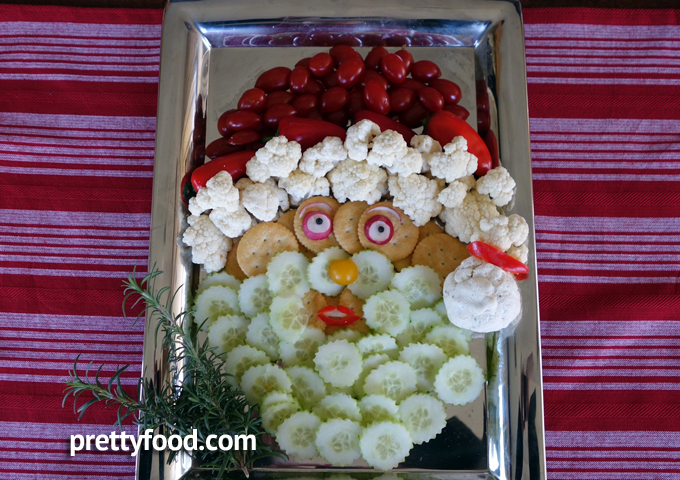
How adorable is this Santa face vegetable platter? It certainly jingled my bells back in 2015 when we did our first Santa Face platter. Since then, at Capers Emporium, it’s been a staple of our holiday appetizers class and ones created by the class participants have been so fun! I will dig out pics and post a few. In the meantime, here is the background on this one. . .
My friend CC texted me a copy of a picture of a Santa face vegetable platter she saw online that was so incredibly creative it made me giddy with delight — and desirous of immediately wanting to create my own version. That’s exactly what I did above. My friend Kay came over and we sliced and diced our way to Christmas magic.
The goal was to create a likeness of Kris Kringle that was made up of grab-and-eat elements that would actually really get eaten.
It went together surprisingly quickly, and I’ll tell you exactly how we did it. Because it is holiday season, I even had all the ingredients on hand. Woo hoo! If you don’t, and you don’t want to go to the store, see what you have that you might be able to substitute.
Ingredients:
- 1 English cucumber
- 2 heads of cauliflower
- 12 Ritz crackers (or similar)
- 1 container red cherry or cherub tomatoes, plus 1 yellow cherry tomato for the nose (or you could use red for the nose, too)
- 1 radish
- 8 red sweet mini peppers
- several black peppercorns (whole)
- 1 white cheese ball (mix an 8 oz. package of cream cheese with 1 tsp. dry Good Seasons dressing mix and 1 packet of Splenda or 2 tsp. Sugar. You will only need 1/3 of the cheese ball mixture for this platter. Use the rest to make Meaty Rollups (recipe elsewhere on this site).
Directions:
Peel the cucumber. If you use a Kiwi Thai vegetable peeler or something else with a pattern to it, you end up with prettier edges on your slices, but you can peel the cucumber and simply score down the length of it in multiple passes all the any around with the tines of a fork to get a similar effect.
Break the cauliflower into medium size florets. You will want the stems to be pretty short so the cauliflower lies down nicely.
Take a slice off the top and bottom of the radish to make two similar size pieces with similar red rims for your eyes.
Cut a cherry tomato in half for the nose.
Form a ball the size of a small peach out of the cheese ball mixture and make it nice and round. (The ball the other folks used looked like it was made with spinach, which added too much green to what was supposed to be the white ball on the cap, IMHO.)
Start arranging!
Kay decided that making the face first (the skin part) was the best thing to do. You have the skin for the eye area, cheeks, and around the mouth. Remember that the “mustache” is going to go between your cherry tomato nose and the mouth. 8 or 9 crackers were used for the main part of the skin, and 3 or 4 were used for underneath where the mouth was going to go. [The pic CC had seen on the Internet used waffle cut carrot slices for the skin. I think the crackers are a much better color choice.]
Place the radish slices on the skin where the eyes should go. Before you do, figure out where you want to put the black peppercorn eyeballs on the radish slices. Once you’re certain of placement, use a small paring knife to carve a little indention in the radish, then press the peppercorns in place, one at a time, using the flat side of a table knife to gently apply pressure. Now you can put the eyes in place. [The eyes on the prototype didn’t have peppercorns. We thought it was a good enhancement. You could also do olive slice eyes, should you prefer.]
Once your eyes are in place, the nose can be positioned correctly.
Make your beard from the cucumber slices next. Don’t be skimpy! Remember to steer around the part of the crackers where the mouth will be placed.
The mouth we made consists of four components — a slice of the white part of the radish to mimic teeth, then two short pieces of red pepper and one long piece to shape around the “teeth” as lips. This is the hardest part. We could have spent an hour or more doing the ultimate mouth, but didn’t have the time or inclination. Perhaps next year.
Next, use your cauliflower to construct the equivalent of the white fur band on Santa’s hat.
Behind the cauliflower, line up your red mini peppers horizontally, all the way across. Beyond the red peppers, the rest of Santa’s hat will be constructed from your little red tomatoes.
Place your white cheese ball off to the side so that it looks like Santa’s hat has folded over slightly, drug down by the weight of the puff at the end. We put a slice of red pepper between the ball of cheese and the cauliflower to tie it visually to the hat, since our platter wasn’t wide enough for the hat to really wrap over that far. (Plus, as I recall, we were out of little tomatoes anyway.)
For a final touch, we added a few sprigs of rosemary. They helped by adding a nice dark green color contrast. Our Santa face vegetable tray was complete!
Santa Claus is comin’ to town — and, I hope, to a table near you!


Leave a Reply