PrettyFood

Creating memories around the table

  • Home
  • Capers
    • Hours and Location
    • Capers News
    • What’s New
    • Product Spotlight
  • Recipes
    • Visual Recipe Index
    • Appetizers
    • Breakfast
    • Desserts
    • Main Dishes
    • Salads
    • Side Dishes
    • Snacks
    • Soups
  • Advice
    • The Basics
    • Ask PrettyFood
    • Critiques
    • Essentials
    • Gadgets & Tools
  • Make it Pretty
    • Tablescapes
    • Flowers
    • Garnishes
    • Holidays & Celebrations
    • Takeout Tricks
  • On the Road
    • Chicago
    • Florence
    • Honolulu
    • Los Cabos
    • Louisville
    • Napa Valley
    • Paris
    • Santa Fe
    • Scottsdale
    • Seattle
  • Special Features
    • A Week of Low-Carb Meals
    • More from Mary Beth
  • About
    • About PrettyFood
    • Contact Us
Home / Make it Pretty / Radish Mice for Your Vegetable Tray

Radish Mice for Your Vegetable Tray

Tuesday, December 1, 2015

mice_radishes

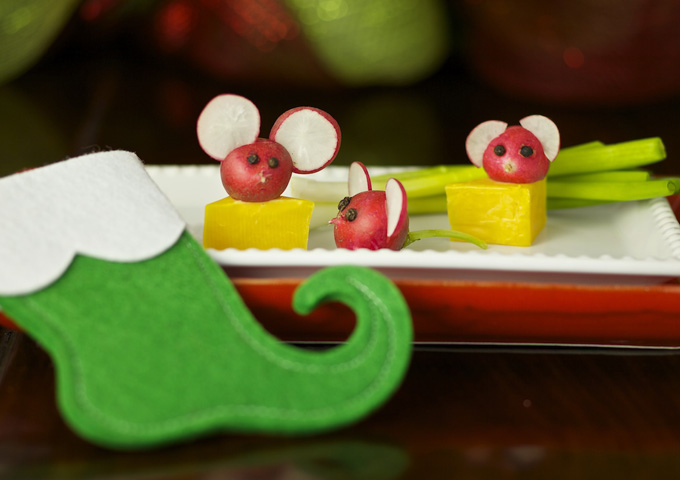
These are the only mice I consider adorable — and they’re edible!  When CC told me about the little radish mice she was going to make, I got so excited.  I envisioned a whole red army of crunchy critters.  Then reality set in when I embarked upon making them.  I am going to warn you up front that they are a pill to make.  Forget the idea of a battalion of rodent-shaped radishes.  Just plan to make 3 or 5.  That’s all you need to kick up the cute quotient on your next vegetable platter.

radishmicewithvegetables

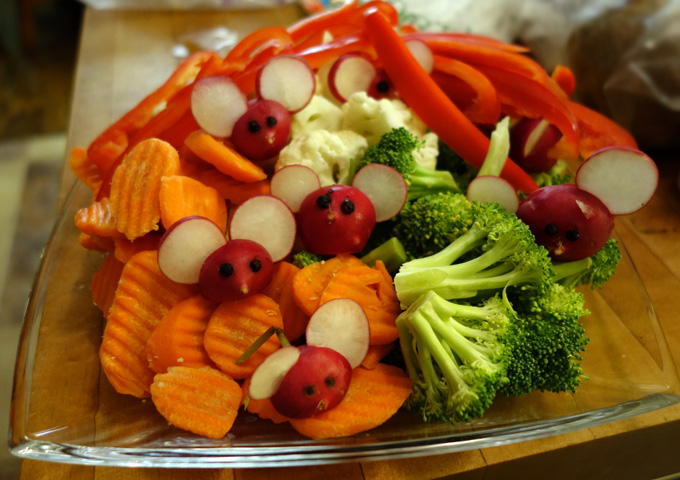
The platter is just plain, ordinary vegetables, nothing special, except that the strategic placement of the 5 radish mice makes it unique and fabulous.

Ingredients:

Whole radishes with the greenery and roots on (not the bag of radishes that has nothing left on it)

Whole black peppercorns

Directions:

You’re going to need a small, very sharp, paring knife.

Wash your radishes and perform an inspection.  Which have the best-looking greenery that could give you a nice tail on each?  You will use those for your mouse bodies.  You will use the remaining radishes to create ears.

The root end is going to be your face.  Use your paring knife or kitchen sheers to trim off the root in such a way that what is left forms a cute little nose.  (Study our pictures to see what we mean.)

Remove all the leaves and stems except for one stem — and make it the best of what you have to choose from.  It’s going to be your tail.

Cut several radishes into thin slices for your ears.  (I know.  It vaguely feels wrong to carve them up for body parts, but that’s what ya gotta do.)  Play match-up to find two fairly identical ones per mouse.

Figure out where you want your ears to go.  Hold up your slices at various spots behind the nose and make your choice.  You will probably find they need to be further back than you may have originally imagined.  Use your paring knife to cut slits that are big enough to tuck the bottom part of each ear into.  It’s a matter of trial and error.  Once you get the ears figured out, cut a slice from the bottom of the radish so that it will sit flat, then go ahead and install the ears into the little slots.

You’re ready for your last step.  Use the point of the paring knife to carve little holes for eyes.  Don’t make them too big, because you are going to use your thumb to push a peppercorn into each one and you want it to stay put once it’s in there!  I should also warn you that occasionally the peppercorns will disintegrate under the pressure.  Just use another when that happens.

If you want these to stay fresh for a few days, put them into a little container with a little cold water on the bottom and keep them in the refrigerator.

miceradishtrio

Print Friendly, PDF & Email
« Waldorf Salad Deconstructed
Gorgeous Platter »

Leave a Reply Cancel reply

Your email address will not be published. Required fields are marked *

• Our store and more •

With Capers Emporium, Mary Beth and Michael Guard have given PrettyFood.com a real home — a large retail store where people can purchase elements to set beautiful tables, concoct wonderful meals, play with gadgets, take cooking classes, and much more!. Read more »

• Hours & Location •

Now open seven days a week!

Sundays Noon – 4 p.m.
Mondays 11:00 – 5:00
Tuesdays 11:00 – 5:00
Wednesdays 11:00 – 5:00
Thursdays 11:00 – 5:00
Fridays 11:00 – 5:00
Saturdays 11:00 – 5:00

MAP »

  • Facebook
  • Twitter
  • Pinterest
  • RSS
  • Email

• Find Recipes •

Newsletter

Receive The News Bite each month.

By Course

Archives


● Farmers Market to Table
● On the Grill
● Dining Outdoors
● Time-Saving Tools
● Mary Beth's Faves

• Visual Recipe Index •

View all of Mary Beth's delicious recipes at once with our Visual Recipe Index.

• Popular •

Crudités

Preparing to Make a Recipe

Cranberry Goat Cheese Pudding Layers

• Tags •

Appetizers Asian Bacon Beef Breakfast Cheese Chicken Christmas Daily Meals December Desserts Dishes Easter Eggs Fall Farmers Market Fish Flowers Fruit Grilling Halloween Italian Low-Carb Meat Mexican Outdoors Parties party food Pasta popular Quick & Easy Seafood Seattle 2010 Snacks Southwest Spring Summer tablescape Thanksgiving Travel Turkey Vegetables Vegetarian Videos Winter
  • Home
  • Recipes
    • Visual Recipe Index
    • Appetizers
    • Breakfast
    • Desserts
    • Main Dishes
    • Salads
    • Side Dishes
    • Snacks
    • Soups
  • Advice
    • The Basics
    • Ask PrettyFood
    • Critiques
    • Essentials
    • Gadgets & Tools
  • Make it Pretty
    • Tablescapes
    • Garnishes
    • Holidays & Celebrations
    • Takeout Tricks
  • On the Road
    • Chicago
    • Florence
    • Honolulu
    • Los Cabos
    • Louisville
    • Napa Valley
    • Paris
    • Santa Fe
    • Scottsdale
    • Seattle
  • Special Features
    • A Week of Low-Carb Meals
    • More From Mary Beth
  • About

f-facebook f-twitter f-pinterest f-rss f-email
Contact Us
Site Map

Copyright © 2025 · PrettyFood | Privacy Policy