 Ingredients:
1 box cake mix, flavor of your choice (I used Pillsbury sugar-free yellow cake mix)
1 can frosting, flavor of your choice (I used Pillsbury sugar-free vanilla)
White chocolate buttons for melting (I used the sugar-free ones from PerfectlySweet.com)
Supplies:
Lollipop sticks (find them in the candymaking section of your craft store or on Amazon.com)
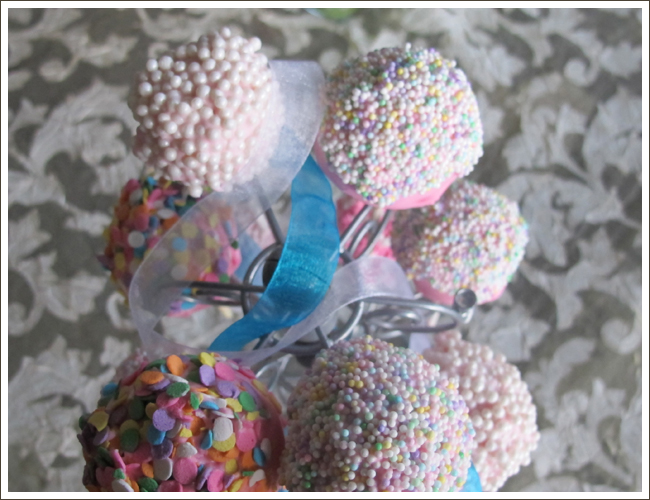
Nonpareils for decorating or a pastry bag for piping on melted candy for decorating (optional) Oil-based food coloring for tinting the dipping chocolate (optional)
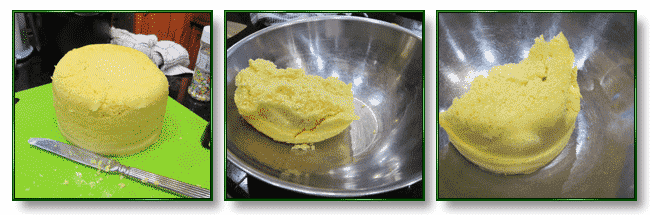
I baked my cake in the microwave, then cut it in half and put it into two different large bowls so that I could flavor each one differently. Bake it however you like. Simply follow package directions.
Crumble the cake, once it has cooled. I planned to use half the cake with the vanilla frosting as it came out of the can, while I mixed lemon extract, lemon juice and lemon zest into the frosting for the other half.
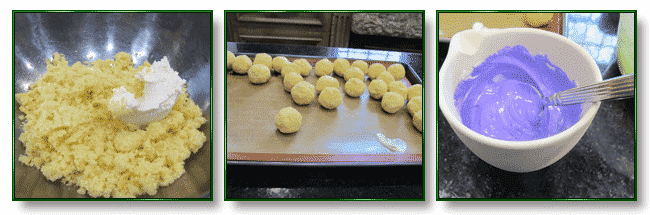
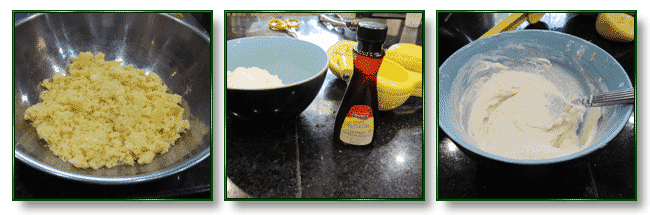
Add enough of the prepared frosting to your crumbled cake to give it a consistency like Playdough. (You remember Playdough, don’t you?) You can then roll balls by hand, or get a good start by using a small cookie scoop to make the initial shape, then rolling it a bit to finish. Place the balls on a cookie sheet that has wax paper or a silicone mat on it and stick it in the freezer for about 45 minutes.
Melt your chocolate buttons according to package directions. I used the Wilton bowls made for this purpose. You microwave the chocolate and the crock bowls help it stay melted. I learned some things along the way:
- Don’t allow any water to get near your chocolate. It fouls up the whole works!
- You can’t use “regular” food coloring to dye chocolate. You have to use oil-based food coloring.
- A little goes a long way. You can always add another drop or two of food coloring, but if you get it too dark, you’re in trouble. The deep lilac you see above was my bad. I ended up having to sacrifice another bag of melts to tone down the color. I won’t make that mistake again. Could I have used the lilac? Yes, but although it was a beautiful color, it was not appropriate for food.
- Don’t do too much chocolate at any one time and pull out the balls from the freezer just a few at a time. You want them quite chilled when you try to coat them in chocolate.
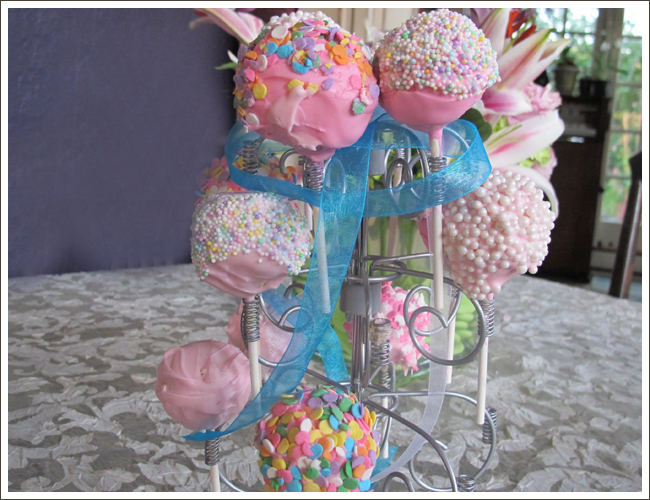
After you have coated a ball in chocolate, dip a lollipop stick into the chocolate, then plunge it abut 3/4 of the way into the ball. Then, if you have a piece of styrofoam, jab the stick down into it to allow the chocolate to cool. I didn’t have any handy, so my cake pops got flat on bottom because I set them back on to the silicone sheet.
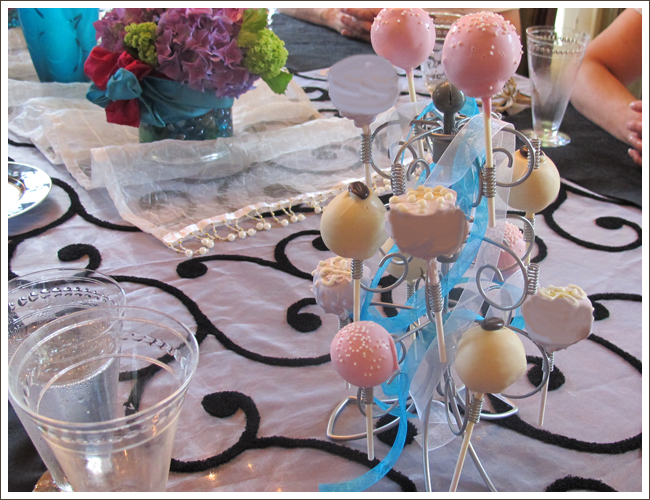
My friend Deloris had purchased the cake pop stand for me sometime back. This was my first opportunity to use it — but it certainly won’t be the last. I combined the sugar-free pops I made with full sugar ones from Starbucks so guests could have their choice. I was told mine were every bit as good as the leaded ones! I’m no Bakerella (the founder of Cake Pops — she’s incredible!), but I’ve conquered the first hurdle — making them sugar-free. I can have lots more fun and be much more creative in the future.
When my friend Michele was out for a visit, we couldn’t resist trying to make what we think are the cutest cake pops in the entire book by Bakerella — the popcorn bags. They look difficult, but we were pleasantly surprised how quickly they came together. Use scissors to cut pieces of marshmallows into irregular shapes, simply snipping little slices at unequal intervals around the side. After you put the cakepop dough on the stick, flatten it on each side by holding a table knife against it.
Immediately after dipping into the white chocolate, stack the “popcorn” on top. The wet chocolate is the “glue” that holds the popcorn on. Allow the chocolate coating to dry completely before using edible markers to draw on your popcorn bag design. 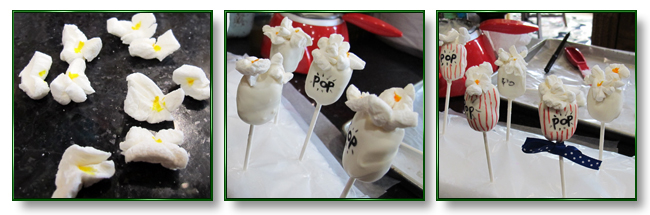
I wanted to mimic the appearance of popcorn hulls, too. A little bit of yellow edible marker did the trick. Aren’t these the most adorable edible things you’ve ever seen?!?

Tip: A tiny bit of lard made the chocolate flow more smoothly. Try 1/4 tsp. or so during the melting process.

Leave a Reply