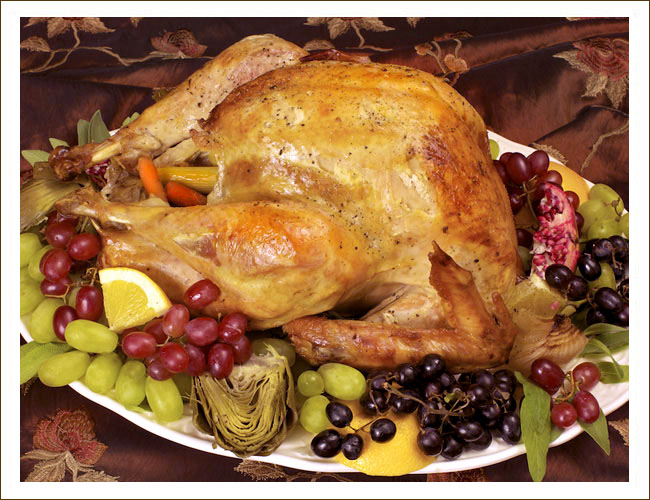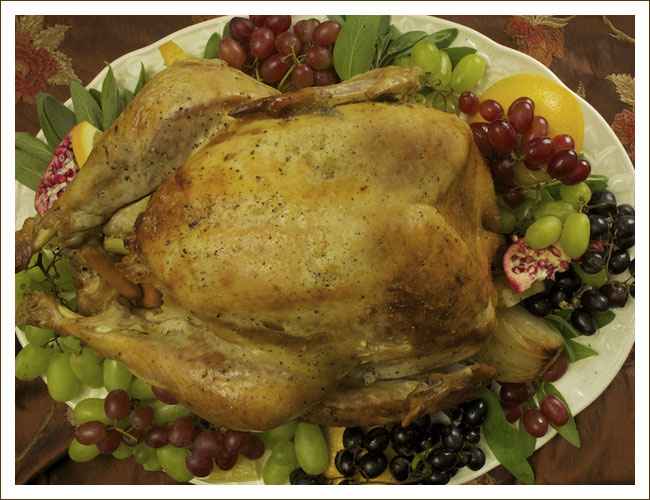
If you’re like me, you have previously never given a thought to how you plate your turkey. Whether you got it from a local grocery store that produces Thanksgiving food on demand, or you baked the big bird yourself, if you’re serving Thanksgiving dinner, do it up right this year. This was my “practice turkey.” I am so proud of it — and can’t wait to make further tweaks for the big day. I’m hoping this will provide you with some ideas to ensure you get a standing ovation when you march into the dining room with your elegant, mouth-watering platter of this traditional meat.
Ingredients for cooking the turkey:
- Turkey — fresh or thawed
- A turkey cooking bag
- 5 stalks of celery
- 1 leek, cleaned and chunked
- 3 cups baby carrots
- 1 lemon, sliced
- 1 lime, halved
- 1 head of garlic
- 2 onions, cut in half, skins removed
- 2 Tbsp. butter
- kosher salt and pepper
Ingredients for garnishing the platter:
- assorted grapes
- pomegranate, halved or quartered
- sage leaves (or parsley if you can’t get sage leaves, or red leaf lettuce or red kale)
- cooked artichokes, sliced in half, or cooked brussel sprouts
- roasted onions
- orange slices/wedges
Directions:
Preheat oven to 350 degrees.

Clean and dry the bird. Rub it all over with a thick coat of butter. Assemble all your fruits and vegetables for cooking with the turkey.

Clean and halve your onions. Wash all the vegetables and fruit. Leave your celery in big pieces. Cut the lemons and limes. The baby carrots can stay whole. Chop the leeks into chunks.

I used my garlic press that allows me to mince garlic without even removing the skin. See how cool it is as it’s extruded. In the middle pic, you can see me picking out the discarded skin with my knife from inside the press. You can also peel a garlic glove by hitting it forcefully with the flat side of a big knife, as I’m doing in the third pic.

I decided to rub the minced garlic on the turkey skin, but to leave the rest of the garlic cloves whole, so I just pounded and peeled them. I put some of the vegetables and fruit in the bag before the turkey. Then it was time to explore the cavities, remove what was lurking in them (giblets and neck), and get ready to put some items inside.

There are two ends open on the turkey. You can put stuff in either way — it will all end up in the middle. I stuffed and stuffed.

You can also lift the skin slightly and put garlic cloves and citrus slices under the skin of the breast. Just don’t be too rough or you will damage it and it won’t be pretty food if you do that!

By the way, not all turkey roasting bags are created equal. They come in different sizes. Get the one that fits your turkey’s size, and don’t forget, once you get your turkey inside, to follow package directions on cutting slits in the top.
When you are baking a turkey in a bag, it always takes a much shorter time than without a bag. Do not overcook your beautiful bird. For example, this was 14.65 pounds, so it was supposed to cook in 3 3/4 hours to 4 1/4 hours. It was plenty done in 3! Check and see how it’s looking. Use an instant read thermometer to make sure the temp is at 180 when measured in the thigh. Take the turkey out once or twice during the baking process so you can gently lift the bag and make sure it’s not stuck to the skin.
ALLOW IT TO REST FOR 30 MINUTES ONCE IT IS DONE before you serve it. That builds anticipation as the aroma wafts around the house. Plus, you’re going to be busy making the platter pretty. Oh, yeah, and it’s essential to keep the juices from running out of the turkey. So, plan your timing accordingly. Don’t think you’ll be ready to sit down to eat the minute the turkey emerges from the oven!
Now, play with your food!! Place the turkey gently on a platter. Assemble all your garnishes and create your own still life art.


Leave a Reply